Showing posts with label CULINARY DELIGHTS. Show all posts

Monday, November 28, 2011

COOKING CLASSES AT HOME ONE ON ONE


cooking classes at home ONE ON ONE

You can learn how to cook the foods you love in a relaxed environment, no matter how your cooking skills are.

CIRCLE THE GLOBE!
There is NO LIMIT what can be done! Thai, Japanese, Hungarian, Austrian, Mexican, Italian, Indian, American, French, simple or complex.

My classes are approximately 2-3 HOURS to prepare one complete meal, bake your own bread or make you very own pasta. If you have a SPECIAL RECIPE that you would like to prepare, email me the information and I will help you to make it a reality.

It does not matter what your SCHEDULE is. Early evenings, after work, afternoons and also weekend classes are available. I require a 48-hour notice (by email) to confirm or to re-schedule.

After discussing with me what you would like to cook and what your cooking skills are, I will send you a detailed shopping list of the GROCERIES 48 hours prior to class. There is also the possibility, that I take care of the shopping for an additional fee.

For your CONVENIENCE, if you choose to order your groceries online or if you do your shopping in Tribeca (Whole Foods), you can have your groceries delivered to my home prior to your class.

After you prepare your meal, bring a Friend or if you are a Bride or Groom to be, your Fiancée to enjoy what you just created if you like.

The FEE for a 2-3 hour class to prepare a full meal is
$ 300.00 for 1 Person or $ 200.00 per Person (max. 3)
A 50% cancellation fee will be charged, if the class is cancelled after prior confirmation for any reason by the Client. A full refund will be paid, if for whatever reason I have to cancel the class.

Classes are being held in my home in NEW YORK CITY (TRIBECA) with panoramic views to all directions. 

Monday, May 2, 2011

TEKKA DON


Approx. 5-6 oz. of high quality Tuna per person
Sushi Rice
Low sodium Soy sauce
Wasabi
Pickled Ginger
Radish pickle
Scallion
Lemon

Sushi Rice

Ingredients:
2 cups Japanese rice
2 cups plus 6 teaspoon water
1/2 cup rice vinegar
1-2 Tbsp sugar
1 tsp salt
In estimating quantities 1 cup of uncooked rice will yield about 2 cups of cooked rice.
For each cup of rice to be cooked, add 1 cup plus 3 teaspoon of cold water.
Makes 4-6 servings.


Preparation:
Soak rice in a bowl of cold water, mixing occasionally with your hands. As the water becomes cloudy, drain through a strainer and rinse until water runs clear. Let the rice drain in the strainer for about 30 minutes.
Prepare sushi vinegar by mixing rice vinegar, sugar, and salt in a sauce pan. Put the pan on low heat and heat until the sugar dissolves. Cool the vinegar mixture.
Put the drained rice with the appropriate amount of water into a heavy medium sized pot and cover tightly. DO NOT lift the lid at any point until the rice is finished cooking, or steam will escape and it will not cook the rice properly.
Gas: Place over medium-high heat until the rice boils. Notice a white foam around the lid. Turn the heat to medium-low and cook approximately 5 minutes until the foam stops turn up to high and you hear a crackling sound. At this point turn off the heat immediately and let the rice stand COVERED for 15 minutes.
Electric: To prevent overcooking on an electric range, change heating temperatures by switching burners, rather than adjusting the heat on the same burner, unless you have a high end Ceramic cook top.
Sprinkle the vinegar mixture over the rice and fold the rice with a rice spatula quickly. Be careful not to smash the rice. Wrap lid in a cloth towel and return lid to cover the pot. Let stand another 10 minutes.
Use of rice for Tekka Don:
Put warm rice into bowl and serve immediately.
Slice tuna into thin slices and arrange on the plate with a Sisho leave, thin slices of radish pickles.
Slice a 3-4 inch piece of scallion except for the last 1 inch into thin long slivers, put into an ice bath so they curl and arrange on the plate (see photo)


Tuna with Hot Pepper Paste
3 tbsp. Hot Pepper Paste (Korean hot-pepper paste (sometimes labeled "gochujang") mixed with 2 tbsp. soy sauce, touch of Sesame oil, 1 tsp. Mirin, 1 tsp. rice vinegar, 1 tsp. sesame seeds, thinly sliced Scallion.
Cut Tuna into small cubes and mix with hot pepper sauce, put into a little flat bowl and top with thin slices of Scallion.
Put pickled ginger, wasabi, soy sauce into individual little bowls and enjoy!
Use of rice for Sushi:

To cool and remove the moisture of the rice well, use a fan as you mix sushi rice. This will give sushi rice a shiny look. It's best to use sushi rice right away.

Thursday, March 31, 2011

CLASSIC MISO SOUP - MISO SHIRU

Serves: 4 servings

Ingredients:
1 small leek (white and light green part only)
5 cups Dashi
a few strands dried wakame seaweed
4 ounces fresh tofu
2 tablespoon red miso

Directions:
Slice the leek finely. Bring Dashi to a simmer, ad the slices of leek and simmer for 3 minutes until just cooked. Brake the wakame seaweed into small pieces (trim of the tough stems), cut tofu into about 1/2 inch cubes. Add to the soup. Dissolve the miso paste in a few tablespoon of the hot stock, blending it with a wire whisk. Stir half the mix into the soup, taste and add more if necessary to make it a rich well tasting soup. Heat up a bit until nearly boiling.

Ladle the soup evenly into 4 bowls, add a few slivers of scallion and serve immediately.

DASHI
2 pieces 2-4 inch dried kombu (edible kelp - large seaweed)
3-5 pack (.175 ounces each) dried bonito flakes

Wipe kombu with a damp kitchen towel and put it into 7 cups of cold water, bring to a simmer for about 10 minutes  (do not boil as this makes it bitter tasting). Skim off any scum. Add 2-3 packs of the bonito flakes and simmer uncovered for another 20 minutes. Turn off and add another 1-2 packets of bonito flakes, let sit for about 10 minutes, strain and use.

Dashi can be stored in a sealed container for up to 3 days or can be frozen.

All these ingredients can be found in any Asian Market.

Monday, March 28, 2011

ANDREA'S PÂTÉ DE FOIE DE VEAU (VEAL LIVER PÂTÉ)

Prep Time: 25 min
Cook Time: 15 min
Serves: 6 servings
Make a day ahead!

Ingredients

3/4 pound fresh veal liver, cleaned
1/4 pound pork tenderloin, cubed
1 cup milk
3/4 stick cold unsalted butter, cut into pieces
1/2 cup chopped yellow onions
1 teaspoon minced garlic
2 tablespoons green peppercorns, drained
or peppercorn mix (black, white, green, pink)
2 bay leaves
1 teaspoon chopped fresh or dried thyme leaves
1/4 teaspoon salt
1/2 teaspoon freshly ground black pepper
1/4 teaspoon five spice
pinch of nutmeg
1/4 cup Cognac or brandy
Parsley leaves, for garnish

Directions
In a bowl, soak the livers in the milk for 2 hours. Drain well. Cut into 1/2 inch slivers.
In a sauté pan or skillet, melt 2 tablespoons of the butter over medium-high heat. Add the onions and cook, stirring, until soft about 3 minutes. Add the garlic and cook until fragrant, about 30 seconds. Add the cubed pork and add 1 tablespoon of the peppercorns, the bay leaves, thyme, pepper, five spice and nutmeg and cook, stirring for about 5 minutes, add the liver and cook the mix for about 5 minutes. Add the Cognac and cook until most of the liquid is evaporated and the livers are cooked through but still tender (liver should be still soft on the inside, do not overcook and do NOT add the salt yet, it will harden the liver).

Remove from the heat and let cool slightly. Discard the bay leaves.

In a food processor, puree the liver mixture. Add the remaining butter in pieces and pulse to blend. Fold in the remaining 1 tablespoon peppercorns and adjust the seasoning, to taste including a little salt (if necessary add more of the five spice).

Pack the Pâté into 6 individual ramekins or small molds, about 4 ounces each. Cover with plastic and refrigerate until firm, at least 6 hours.

To serve, place the ramekins on individual plates. Garnish the tops with parsley. Instead of the small molds, use two larger bowls (2-3 inch diameter) and just wet out on the table for everybody to help themselves.

Serve with baguette (or Austrian Saltsticks with caraway seed - see recipe on this blog), cornichons, Dijon mustard and the onion jam on the side.

ONION JAM

Prep Time: 25 min
Cook Time: 15 min
Serves: 6 servings

Make a day ahead!

Ingredients
1/2 stick unsalted butter
(or 1/4 stick butter and 2 tablespoon olive oil)
3 cups sliced yellow onions
1 tablespoon brown sugar
3 tablespoon honey
2-3 tablespoon balsamic vinegar
1/2 cup dried cranberries
1/4 teaspoon salt


Directions
In a sauté pan or skillet, melt the butter over medium-high heat. Add the onions and sugar and cook, stirring, until soft and golden brown. Lower heat to medium, add the honey and cook for another 3-5 minutes – careful not to burn it.  Lower heat. Add the balsamico and a pinch of salt stirring for about 3 minutes, add the cranberries and leave on low for another minute. Take off and let cool to room temperature for serving.

Accompaniment for Pâtés or Stinky cheese.

Thursday, March 24, 2011

SPINACH FETTUCCINE WITH SHRIMP, TOMATOES AND WILD ARUGULA


© Copyright by Andrea White

Yield: Makes 2-3 servings

8 ounces fresh spinach Fettuccine pasta
2 tablespoons olive oil
1 cup uncooked medium shrimp, peeled and de-veined
1/2 cup leeks (white and light green part only) cut into thin rounds
1 garlic clove, minced
3 large plum tomatoes or tomatoes on the vine, peeled and cut into thin wedges
1 tablespoons tomato paste
4 tablespoons chopped fresh basil
4 tablespoons chopped fresh parsley
3 tablespoons fresh lemon juice
2 teaspoons grated lemon peel
2 cups (packed) wild arugula and/or
2 cups (packed) baby spinach leaves
Salt and fresh ground pepper
1/2 cup grated Parmigiano Reggiano


Peel Tomatoes and cut into thin wedges add the tomato paste and salt and pepper. Let stand at room temperature for at least one hour, so the juices collect.

Cook pasta in large pot of boiling salted water with a little olive oil until just tender but still firm to bite. Ladle 1/2 cup pasta cooking liquid into small bowl and reserve. Drain pasta. Return pasta to pot; cover to keep hot.

Meanwhile, heat oil in large skillet over medium-high heat. Cook the leeks for a few minutes until wilted. Sprinkle shrimp with pepper. Add shrimp and garlic to skillet and sauté 2 minutes. Add tomatoes, 2 tablespoons basil, lemon juice and lemon peel and sauté until shrimp are cooked through, about 3 minutes.
Add arugula and or spinach leaves to the sauce until wilted. Pour shrimp mixture over pasta and toss to blend. Add enough of reserved pasta cooking liquid to moisten. Season to taste with salt and pepper. Transfer pasta to a bowl.
Sprinkle with remaining 2 tablespoons basil and parsley and Parmigiano Reggiano

Eat with garlic bread or thin crust Pizza with Garlic and Olive Oil and a mixed green Salad. Accompany with a nice crisp Pinot Grigio

Saturday, February 19, 2011

BUFFALO CHICKEN WINGS


History:
There are different legends about how the Buffalo wings came to be. One story is that Buffalo wings were first prepared at the Anchor Bar, located at 1047 Main Street (between North Street and Best Street) in Buffalo, New York, USA on October 3, 1964 by Teressa Belissimo, co-owner of the Anchor Bar with her husband Frank. Upon the unannounced, late-night arrival of their son, Dominic (and several of his friends from college), Teressa needed a fast and easy snack to present to her hungry guests. It was then that she came up with the idea of deep frying chicken wings (normally thrown away or reserved for stock) and tossing them in cayenne hot sauce. While the wings were deep frying, Teressa decided to serve left over celery sticks with blue cheese to her son and his friends to tide them over. This is the reason why in most places buffalo wings are served with celery and eaten with Blue Cheese.
Here is my Version:
Ingredients:
16 chicken wings (about 3 pounds)
For frying:
2-3 cups sunflower or any other neutral vegetable oil
1 cup grape seed oil (optional)

Hot Sauce:
1/2  stick unsalted butter
1 teaspoon  chili flakes (optional)
1 Cup Frank's Hot Sauce or Sriracha Hot Sauce
1 tablespoon white wine vinegar
1/4  teaspoon kosher salt and fresh pepper
1 teaspoon honey

Dipping Sauce:
1  cup crumbled Gorgonzola or other strong blue cheese
4 tablespoon good mayonnaise
4 tablespoon sour cream
2 tablespoons yogurt
1/8 teaspoons kosher or sea  salt
1/4 teaspoon freshly ground black pepper (optional)
Celery sticks
Carrot sticks, for serving 

You can deep-fry these wings à la Anchor Bar, but they're just as delicious hot off the grill or the broiler.

Directions: 
Make dressing: In a bowl whisk together mayonnaise, sour cream and yogurt and stir in blue cheese (dressing will not be smooth). Dressing may be made 8 hours ahead and chilled, covered. Cut celery into thin sticks. Soak celery in a bowl of ice and cold water at least 30 minutes and up to 1 hour to make them real crunchy. Cut carrots into sticks

.
Cut the chicken wings in half, cutting between the bones. Discard the wing tips.
 
Frying: Using a fryer or a large pot, heat sunflower oil and grape seed oil (Optional) to 380 degrees F. Deep fry  the first batch of  wings - don't  overcrowd. Carefully lower wings into oil and fry, stirring and turning occasionally until golden and crispy, approximately 10 minutes.  With a slotted spoon transfer wings to paper towels to drain. Pat dry and fry remaining wings in same manner, returning oil to 380°F between batches.
Broiler: Preheat the broiler. Put the wings on a sheet pan and brush them with oil. Broil them about 3 inches below the heat for 8 minutes. Turn the wings, brush them again , and broil for 4 more minutes or until cooked. 
 
Melt the butter and add the chili flakes(optional), hot sauce, vinegar, honey and salt and pepper set aside. 
 

Transfer the Hot Sauce to the serving dish add the wings and toss until evenly coated. Serve the chicken wings hot or at room temperature with the blue cheese dip, celery and carrot sticks. Keep left over hot Sauce for more dipping.
Enjoy!


By the way you do NOT need cutlery, just a LOT of napkins!


Thursday, May 20, 2010

CURRY PASTE

BASIC INDIAN CURRY PASTE

2-4 (depending how big they are) green or red chilis (I normally use Jalapeño or Serrano)
1 onion or shallot (medium)
4 garlic cloves
2 inch fresh ginger, peeled and sliced
2 lemon grass, fresh white part only sliced  or 2 tsp dried lemon grass
1 1/4 tsp turmeric
2 tsp coriander powder
2 tsp garam masala
2 tsp cumin powder
2 tbsp vegetable oil
pinch of salt and a little fresh pepper
2 tbsp lemon or lime juice

Just cut up the larger items into smaller cubes, put in a blender until you have a nice soft paste. If you think the paste is still to thick, just add a little more of the oil. This paste will keep refrigerated up to a month, may also be frozen.

Wednesday, May 19, 2010

SPINACH PASTA - HOME MADE!

  
SPINACH FETTUCCINE


(makes about 1 1/4 lb pasta)
10 oz. Fresh or frozen spinach
1 tablespoon water
1 tablespoon olive oil
4 eggs
4 cups sifted all-purpose flour
1/2 teaspoon salt
Boil spinach for one minute in little water, drain and put into ice bath for 3 minutes
Drain and wring out all water until spinach feels very dry. Finely chop spinach usind a food grinder attachment, food processor or blender.
Place chopped spinach, water, oil, eggs, salt  and flour in mixer bowl (I am using the KitchenAid machine with the pasta sheet roller and cutter). Attach flat beater and turn to speed 2 and mix 30 seconds. Change flat beater for dough hook. Turn to speed 2 and knead for about 5 minutes. Remove dough from bowl and let it rest for 20 minutes wrapped into plastic wrap. Divide into 4 pieces before processing with Pasta sheet roller attachment. Always wrap the unused dough into plastic wrap, so it does not dry out.
Peter’s Shrimp, Artichoke, Curry Sauce is perfect with this pasta! (See Peter’s Penne with a twist!)


Saturday, February 20, 2010

PARISIAN DAILY BREAD

     BAGUETTE


Ingredients:
1 1/2 cups tepid water (70 to 78 degrees)
2 tsp.instant yeast
3 1/4 cups unbleached all-purpose flour
1 1/2 tsp. sea salt or kosher salt

Pour the water into the bowl of a stand mixer. Add the yeast, flour, and salt, and stir with a rubber spatula just until all the water is absorbed and a dry, clumpy dough forms. Cover the bowl with plastic wrap and let stand for 20 minutes, to allow the flour to absorb the water.

Use the dough hook of a stand mixer and mix the dough on low speed (2 on a Kitchen Aid mixer) for 8 to 10 minutes until it is very smooth and springy.

Transfer the dough to a lightly oiled, clear, 2-quart, straight-sided container with a lid. With masking tape, mark the spot on the container where the dough will be once it has increased 1 1/2 times in volume. Cover and leave it to rise at room temperature (70 to 75 degrees) for 45 minutes. It will increase by about 25 percent.

Lightly dust a work surface with flour and, using a bench scraper or spatula, empty the risen dough out of the container. Pat it gently into a rectangle, about 6 by 8 inches, and fold it into thirds like a business letter. With the short side facing you, lift the top edge and fold it into the center of the rectangle; lift the near edge and fold it into the center so that it overlaps the top edge by about 1 inch. Quickly slide both hands under the dough and flip it over so the folds are underneath. Slip it back into the container, pushing it down to fit. Cover the dough and let it rise in a warm and draft-free spot until it expands, reaching halfway to the masking tape mark, 45 minutes.

About 1 hour before baking, place a baking stone on the middle rack of the oven and a cast-iron skillet on the lower rack. Preheat the oven to 450 degrees. (If you are baking the breads on a baking sheet, it’s only necessary to preheat the oven about 20 minutes before baking.)

Lightly dust your work surface with flour. Uncover the dough and turn it out onto the work surface. With a bench scraper or chef’s knife, cut the dough into 3 equal pieces. Gently pat each piece into a rough rectangle and fold it in half. Sprinkle the pieces of dough with flour and lightly drape them with plastic wrap. Let them relax on the counter for 10 minutes.

Cover a baker’s peel or rimless baking sheet with parchment paper and lightly dust with flour. Set aside. On a lightly floured work surface, pat the dough into a rough rectangle measuring about 3 by 5 inches. With the longer side facing you, fold the top of the dough down about one-third of the way toward the center. With the heel of your hand, press along the seam using firm but gentle pressure. Fold the bottom of the dough about one-third of the way toward the center and seal the seam firmly. Fold this skinny rectangle in half, bringing the top edge down to meet the bottom edge. Working from right to left, cup your hand over the log of dough and press the heel of your hand down firmly to seal the seam. Dust the work surface with additional flour to prevent the dough from sticking.

To stretch the log, place your hands together, palms down, over the middle of the log. Using light, even pressure, roll the log back and forth as you spread your hands apart. Repeat 3 or 4 times until the log is the desired length, about 14 inches long. Leave the ends rounded.

Place the baguettes on the parchment, seam sides down, about 2 inches apart. Lift the parchment between the loaves, making pleats and drawing the loaves together. Tightly roll two kitchen towels and slip them under the parchment paper on the sides of the two outer loaves to support and cradle the baguettes. Lightly dust the tops of the baguettes with flour and gently drape them with plastic wrap. Let the loaves stand at room temperature for 30 to 40 minutes. They will increase about 1 1/2 times in size.

Uncover the loaves, take away the towels, and stretch the parchment paper out so it is flat and the loaves are separated. Score each baguette with a single-edge razor blade or a serrated knife. Starting from the tip, angle the blade 45 degrees to make 3 slashes about 3 inches long and 1/2 inch deep.

Slide the loaves, still on the parchment, onto the hot baking stone or rimless baking sheet.

Place 1/2 cup of ice in the hot cast-iron skillet and slide back onto the lower rack to produce steam. Bake the baguettes until caramel-colored, 15 to 20 minutes.

Slide the peel or baking sheet under the parchment paper to remove the loaves from the oven. Slide the loaves, still on the parchment, onto a wire rack to cool.

"Local Breads" on amazon.com. Its fun to make your own Bread!
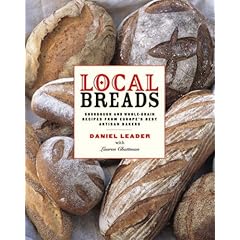
Local Breads: Sourdough and Whole-Grain Recipes from Europe's Best Artisan Bakers"Parisian Daily Breads" page 66!

I made also a "Foccacciiish" version with the Baguette dough, adding 1 tablespoon of Olive Oil and chopped fresh Rosemary.


Just dunk it into good Olive Oil or try Pumpkin Seed oil ... a good glass of red wine - it is HEAVEN !!!!


Tuesday, November 24, 2009

BISCOTTI


HEAVENLY BISCOTTI


Andrea’s Almond BISCOTTI


Ingredients:
3/4 cup Natural Turbinado Sugar
(made from sugar cane, it has a hint of sweet golden molasses)
1 stick unsalted Butter, melted
3 tablespoons Austrian Stroh Rum (or any other spiced Rum, Brandy, Cognac or Scotch) (Optional)
2-3 teaspoons pure Almond Extract (preferably Nielsen-Massey)
2 teaspoons Orange Flower Water (preferably A. Monteux)
1 teaspoon pure natural Vanilla extract
1 cup almonds slivers, lightly toasted
3 large eggs
2 3/4 cups all-purpose flour
1 1/2 teaspoons baking powder
1/4 teaspoon salt
Preparation:
Stir together with a rubber spatula sugar, butter, rum, and extracts in a large bowl, then stir in almonds and eggs. Stir in flour, baking powder, and salt until well combined.
Chill dough covered for 30 minutes.
Preheat oven to 350°F with rack in the middle.
Using moistened hands, halve dough and form 2 (16-by 2-inch) loaves on an ungreased large baking paper sheet.
Bake until pale golden, about 30 minutes. Carefully transfer loaves to a rack and cool 15 minutes.
Cut loaves into 1/4 to 1/2 inch slices with a serrated knife.
Arrange biscotti, with a cut side down, on a clean baking sheet and bake until golden, about 15 to 20 more minutes (do not over bake, check color after 10 minutes).
Transfer to rack to cool completely.
Note: Biscotti improve in flavor if made 1 to 2 days ahead. Keep in an airtight container at room temperature.